This post may contain affiliate links. Please read our disclosure policy.
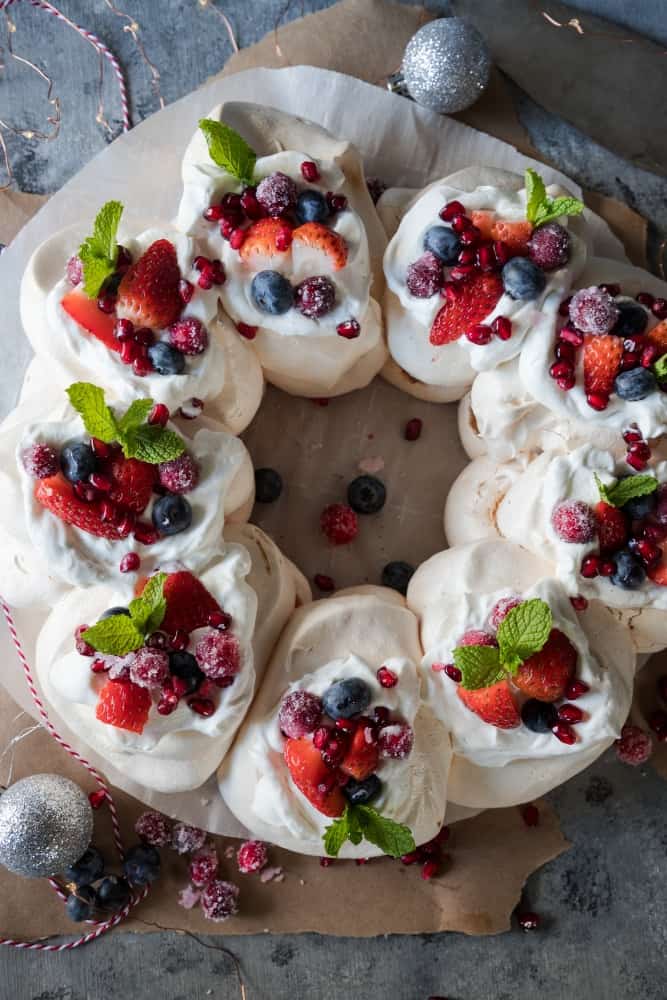
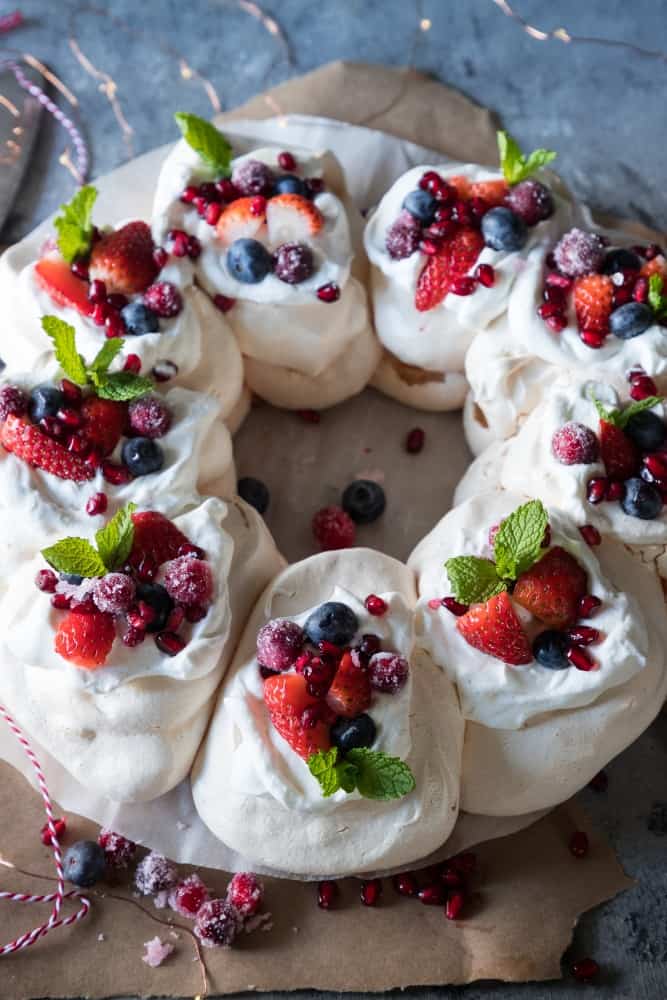
The Christmas desserts of all Christmas desserts! This pavlova wreath is an absolutely gorgeous dessert recipe that will wow your Christmas guests! A beautiful showstopper for the table and with some easy tips and tricks, you’ll be nailing this in no time!

Hey guys! Georgie here again from The Home Cook’s Kitchen! I’m not going to lie, I am SO excited to be sharing this recipe with you today for my gorgeous Christmas pavlova wreath! If you caught my last post, you’ll know that I’m an Aussie living in the US. As a typical Aussie, I couldn’t go past sharing one of my favourite desserts at Christmas time – pavlova!
If you’ve never had a pavlova before, you are in for a total treat! Every time I make this for my American friends, they are amazed by the way it tastes and beg me for my best pavlova recipe! I wanted to do something a little different for Meghan however, and I thought that a pavlova wreath would be such a beautiful way to bring a little Aussie and America together this Christmas!
I’ll do my best to explain how a pavlova tastes, but the proof is in the tasting itself, in other words, you should definitely make it! You start with a super crispy outer shell, and cut into a soft, marshmallow center that is SO light and fluffy, you think you’re eating clouds. The pavlova itself is not crazy sweet, and is usually topped with fresh cream and fruit of your choice.
This is the dreamiest dessert and while the technique may be on the trickier side, the pavlova itself is only comprised on a few ingredients – eggs, sugar, vinegar, cornstarch and vanilla. Lucky for you guys, I have been making pavlova for many years, and am known as the ‘pav master’ in the family! So I am here to take you step by step through the instructions, so you can make this gorgeous pavlova wreath at home!
How To Make a Pavlova Wreath
As the name suggests, a pavlova wreath, is a pavlova shaped into a Christmas wreath. The great thing about this dessert, is that you actually end up with individual mini pavlovas, which makes cutting and serving an absolutely breeze. It’s also super festive and would make the most beautiful showstopper dessert for Christmas day!
How to Make the Pavlova Base
You start with 6 egg whites that have been brought to room temperature. I usually separate my eggs, then leave them to come to room temperature separated rather than in the egg shells. It seems to take less time.
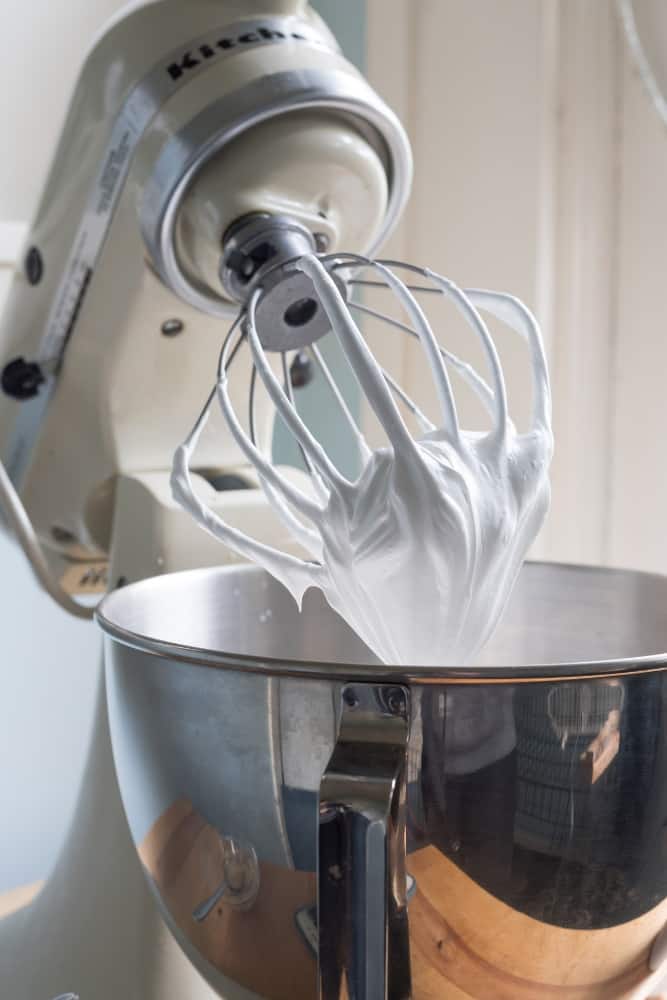
Using a stand or hand mixer, you beat the eggs whites until stiff peaks form. It’s super important to use a clean, dry bowl and mixer attachments, and make sure absolutely no egg yolk gets into the whites.
You can easily test how firm your egg whites are by very carefully tipping the bowl upside down. If the whites start to slide, you need longer. You should be able to hold the bowl upside down without the egg whites falling out (just be careful!).
Once the egg whites are firm, you GRADUALLY add in the sugar, ¼ cup at a time. This ensures that the sugar is evenly combined. Once the sugar has all been incorporated, you whisk on high for 3 minutes. To test if the sugar is incorporated enough, take a tiny piece of meringue and rub it between your thumb and index finger. You shouldn’t be able to feel any grains.
Once you’ve whisked the eggs whites and sugar for three minutes you combine the vinegar, cornstarch and vanilla and add to the mix. The cornstarch and vinegar help the pavlova hold its shape, so they are essential ingredients. The vanilla adds just a little bit of flavor. Whisk this until it’s just combined.
How to Prepare the Baking Tray for a pavlova wreath
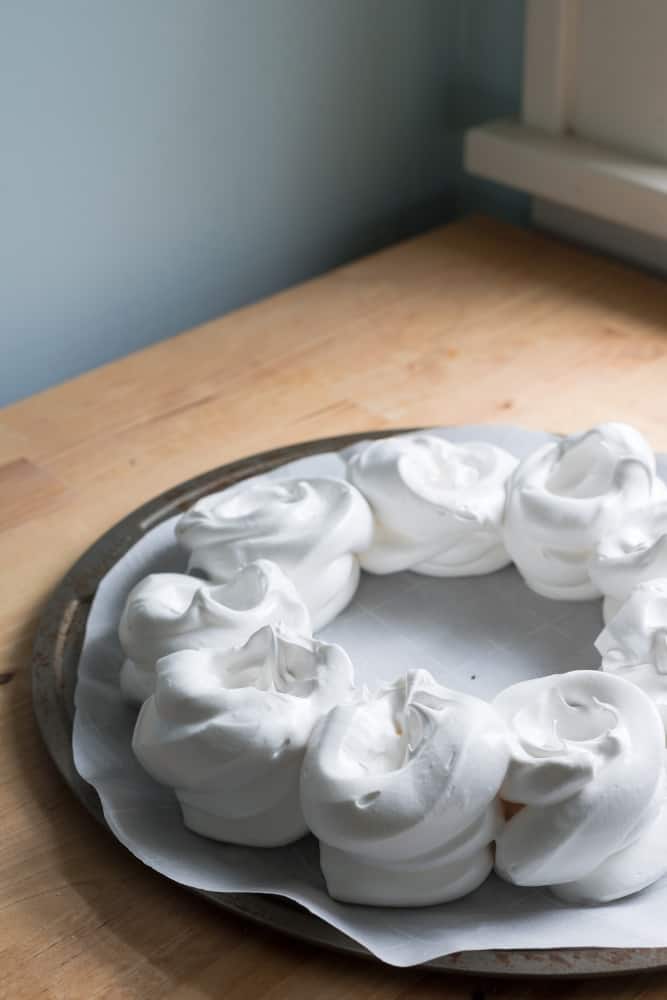
The easiest tray to use is a round pizza tray that measures more than 10”. You’ll draw a 10” circle on a piece of parchment paper, then a smaller 5.5” circle in the center of the larger circle. You’ll pipe the meringue in between the two circles to create your wreath.
How to Pipe the Pavlova
The easiest method to pipe your meringue is to use a piping bag with a large round tip. If you don’t have a piping bag or a large tip, I’ll share a little hack! I use a gallon zip lock bag! I scrape all of my pavlova mixture into the ziplock bag, squeeze out the air and squeeze the pavlova mixture into one corner and snip a large hole in one of the bottom corners! It works a treat and you still have the same control you would with a normal piping bag!
When it comes to actually piping, you want to pipe at least 10 evenly sized pavlovas. I made mine a little too big and got 9, you should at least be able to fit 9-10 on the parchment paper. Pipe straight down into the gap between the two circles to create your perfect little wreath. Repeat 9-10 times until your wreath is enclosed. Then with the back of a small spoon, gently create a little hollow on each pavlova mound. This will help to hold your cream and berries.
Here is another tip: If you find that the parchment paper is slipping, dab tiny bit of meringue the bottom of each corner of your parchment paper and press it onto the tray. This should hold the paper firmly to the baking tray.
How to Cook a Pavlova Wreath
Pavlovas cook in a slow oven for a long time and there are some very important things to consider:
- Preheat your oven to 300F, the reduce the oven temperature to 250F just before you put your pavlova in.
- Place your pavlova on the middle tray of your oven to ensure an even cooking surface.
- DO NOT under any circumstance, open the oven doors! The pavlova may flop.
- The pavlova will take around 1 hour and 10-15 minutes to cook. When it starts to hit the hour mark, you can open the oven to check. Two signs for a cooked pavlova – it’s dry to the touch, and it’s just starting to brown ever so lightly.
- Once your cooking time is up, turn off the oven and let the pavlova cool down in the oven with the door closed for 1-2 hours. Then pull it out and let is further cool to room temperature before you start to decorate it.
How to Decorate Your Pavlova Wreath
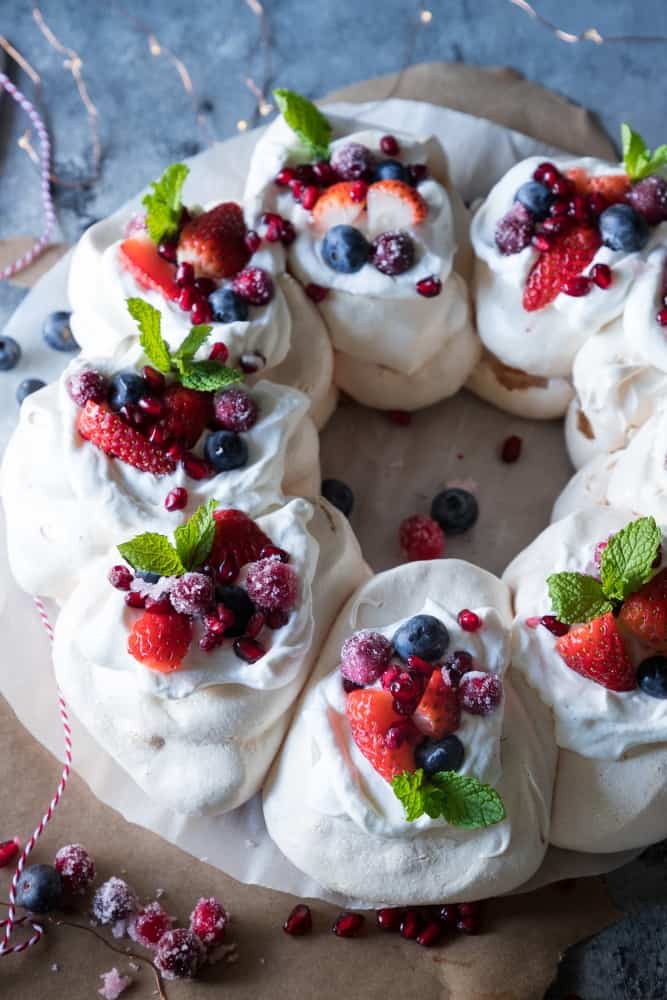
Once your pavlova has 100% cooled, you can start decorating. I start by whipping together some cream and vanilla bean paste to add to the individual pavlovas in the pavlova wreath. Then I topped it with fresh fruit and mint.
To keep this festive, I used:
- Fresh pomegranate
- Sugared cranberries
- Blueberries
- Quartered strawberries
- Fresh mint leaves
The type of fruit you use is up to you, but I loved the festive colours of red and green, and added blueberries for just a touch of colours. Raspberries would also work beautifully, as would red currants.
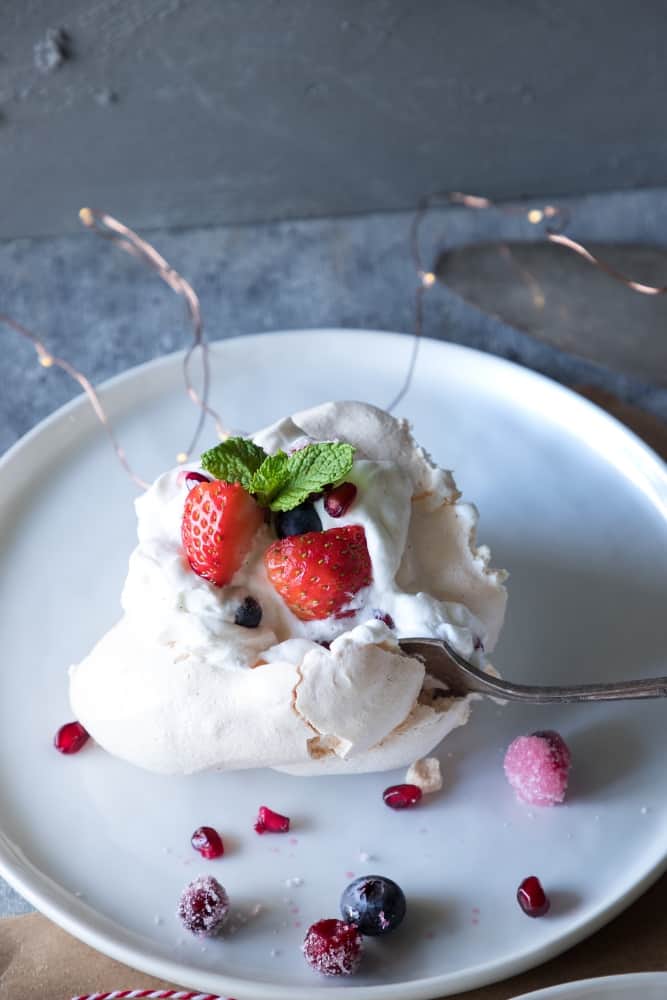
How to serve a Pavlova Wreath
To serve, gently slice into between each individual pavlova and serve on a plate with a dusting of icing sugar if you wish. This pavlova wreath should serve 9-10 people, depending on how many pavlovas you were able to pipe.
This pavlova wreath is truly a beautiful dessert to serve at Christmas, or for any other occasions you’re looking for a dessert that feeds a crowd! It’s such an elegant dish and one to surely ‘wow’ your friends, family and loved ones! Feel free to ask me any questions about this recipe and I’ll sure to answer them via Meghan!

Pavlova Wreath

Ingredients
- 6 egg whites at room temperature
- 1 ½ cups sugar
- 3 teaspoons cornstarch/cornflour
- 1 teaspoon white vinegar
- 1 teaspoon vanilla extract
- 1 cup heavy whipping cream
- 1 teaspoon vanilla bean paste
- fresh fruits for decorating - pomegranate aril sugared cranberries, raspberries, strawberries, blueberries, red currants, or other fresh fruit that you like.
- fresh mint leaves
Instructions
- Preheat oven to 300°F.
- Trace a 10” diameter circle on a piece of parchment paper with a pen. Trace a 5.5” circle in the centre of the large circle. Place the parchment paper upside down on a pizza tray. Trim the edges of the paper if necessary.
- In a large clean bowl, whisk egg whites until stiff peaks appear.
- Gradually add sugar ¼ of a cup at a time, beating after each addition. Once the sugar has dissolved, beat on high for three minutes.
- Combine the cornstarch, white vinegar and vanilla in a small bowl and stir.
- Add to the egg whites and sugar and whisk until just combined.
- Transfer mixture to a large piping bag or gallon ziplock bag with a hole cut into the corner.
- Pipe 10 evenly spaced mounds onto the parchment paper in the circle, using the traced ring as a guide.
- Once you’ve piped your mounds, use the back of a spoon to create a small hollow in each mound.
- Reduce oven temperature to 250°F.
- Place the pavlova wreath in the oven, on a centre rack.
- Bake for 1 hour to 1 hour and 10 minutes. The pavlova should be dry to the touch and just starting to brown lightly.
- Turn off the oven and leave the pavlova to cool for one to two hours with the oven door closed.
- Meanwhile, whisk the heavy cream and vanilla until it’s smooth.
- Take pavlova out of the oven and cool for a further hour or until it’s ready to be served.
- To serve, spoon the cream into the hollow of the pavlovas and top with your fresh fruit and mint leaves.
- This pavlova wreath is best eaten on the day, however will keep for one day covered in an airtight container in the fridge. It is best to serve it the day you make it however. Fresh is best!
Notes
Nutrition information is automatically calculated, so should only be used as an approximation.


I’ve made many pavlovas but this is my favorite way to do them. Nice for a crowd!
This is just so fun… and beautiful!
Thank you! Georgie did a great job!