This post may contain affiliate links. Please read our disclosure policy.
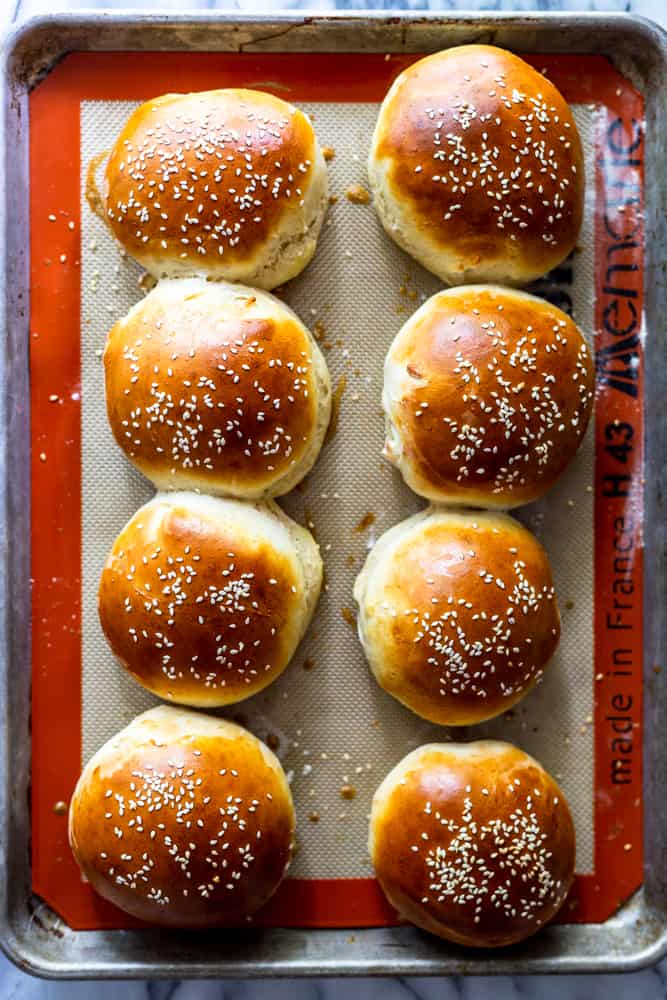
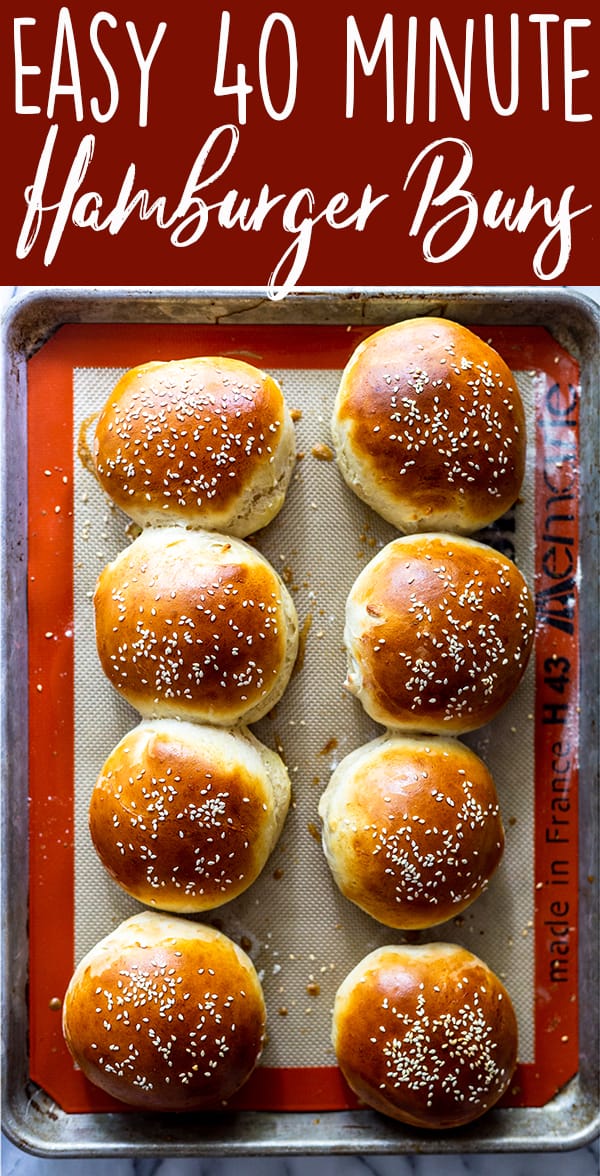
These Homemade Hamburger Buns are incredibly fast, easy and delicious! In less than an hour, you can have soft and fluffy hamburger buns without going to the store. Make this 40 minute hamburger bun recipe for your next cookout!
Disclosure: This post contains affiliate links, which means that if you purchase the items I recommend through the links I provide, I get a small commission at no extra cost to you. For more info, please see my disclosure policy. Thanks for supporting Fox and Briar!
Anyone else baking up a storm lately? I normally buy hamburger buns, but recently I had a craving for burgers and didn’t want to go to the store. Instead, I whipped up this 40 minute hamburger bun recipe and I was astonished by how easy there were, not to mention delicious!
The best hamburger bun recipe
I was suspicious that a recipe with such a short rise time could be good, but I was in a pinch and needed burger buns fast. After making these several times, and some other recipes with longer rise times, my husband swears up and down that this is the best hamburger bun recipe I have ever made.
How do you make hamburger buns from scratch?
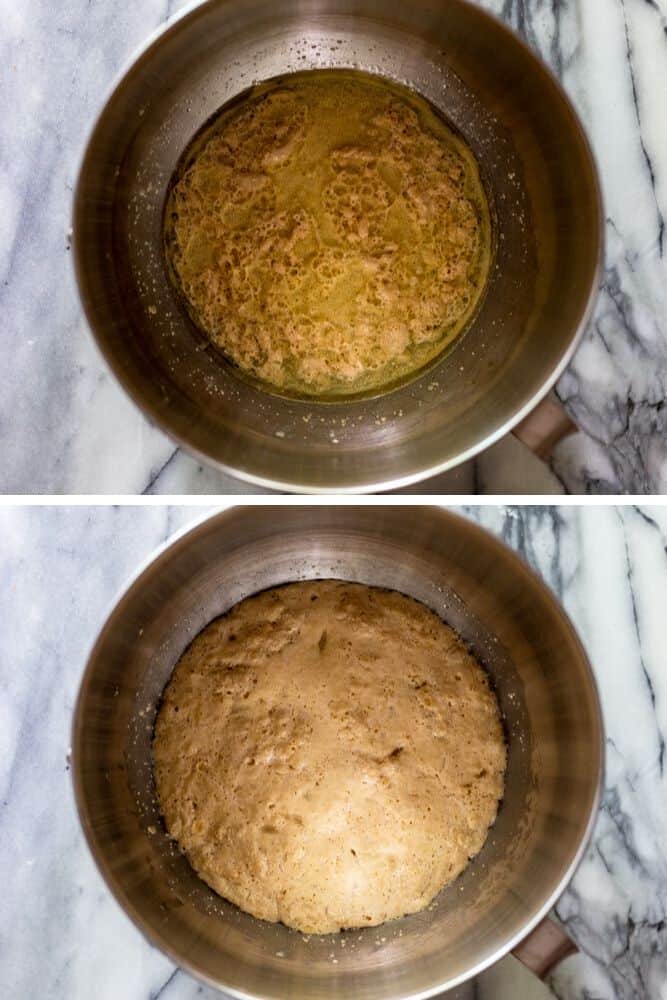
This recipe for hamburger buns is surprisingly easy. Simply mix the yeast with some warm water, sugar and oil. Then let it sit for 5 minutes. This step “wakes up” the yeast, and the sugar is food for the yeast to start creating gas. After five minutes, you will see that the mixture has become foamy. This means your yeast is doing what it is supposed to do!
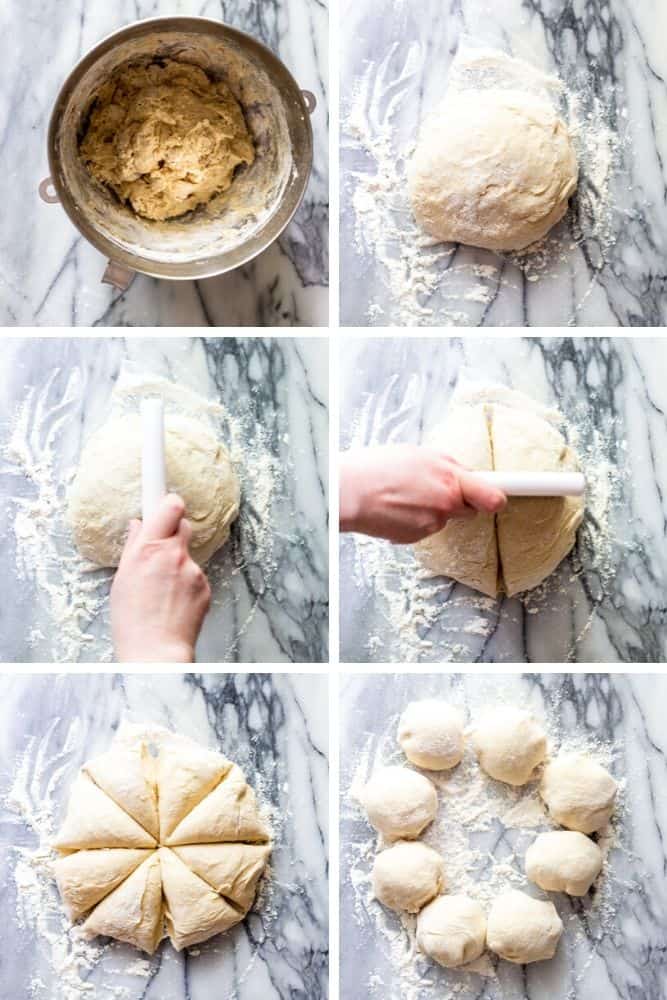
Next, you mix in an egg, the flour, and salt. Continue to add flour until you have a soft dough. You can do this step by kneading with your hands, or you can use your stand mixer fitted with a dough hook, which is what I did.
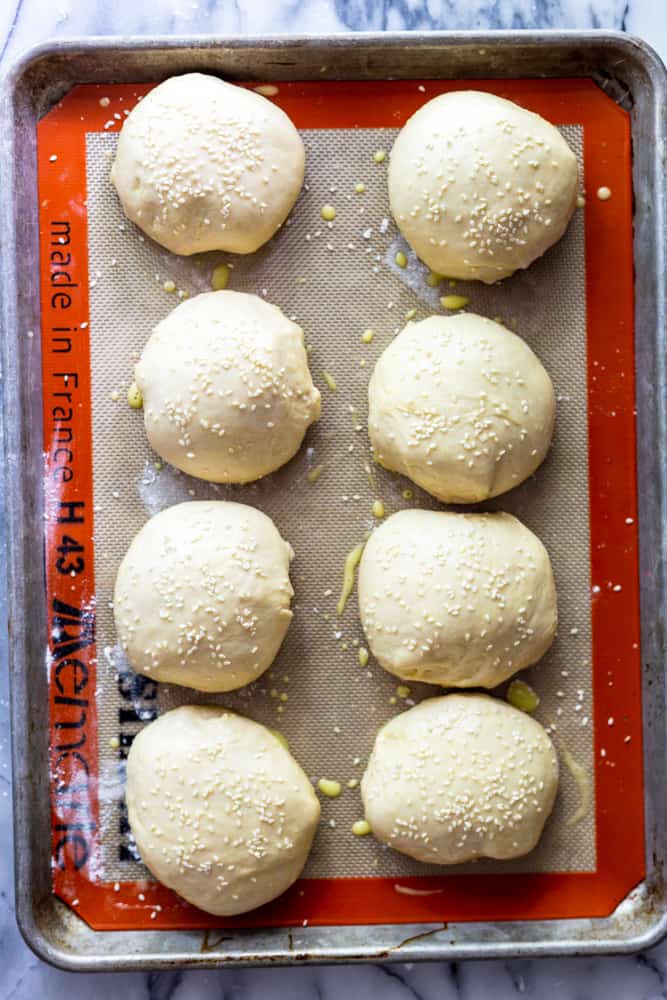
Then you will quickly shape the dough into a ball and divide into 8 pieces. I use a bench scraper to do this. Shape each piece into a ball, then arrange on a greased or lined baking sheet. Cover and allow rise for 10 minutes. While the dough is rising, preheat your oven to 425 degrees.
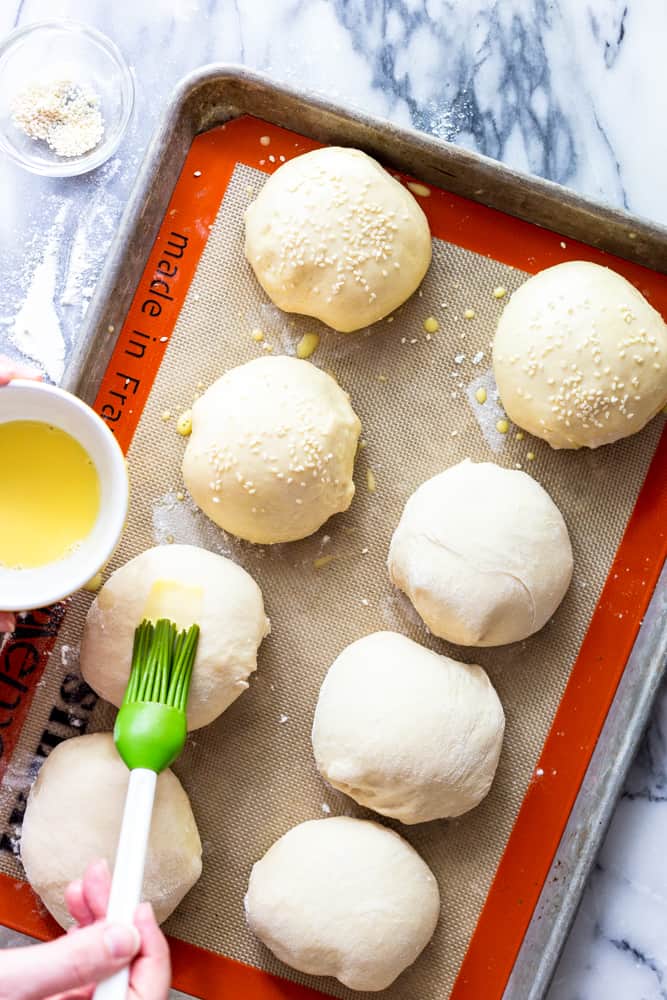
How to make an egg wash
In order to make the most beautiful burger buns, I decided to use an egg wash for a nice shiny and golden top, sprinkled with sesame seeds. To make an egg wash, simply mix one egg yolk with 1 tablespoon of water. Brush the mixture over the tops of the burger buns, then sprinkle with sesame seeds.
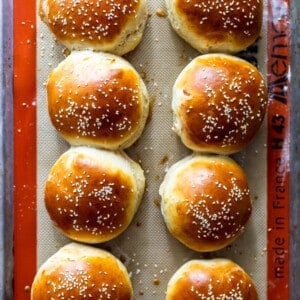
After the 10 minute rise time, then being brushed with the egg wash and sesame seeds, the burger buns are ready to go into the oven. After 8-12 minutes, you will have soft, fluffy and golden hamburger buns, fresh from the oven.
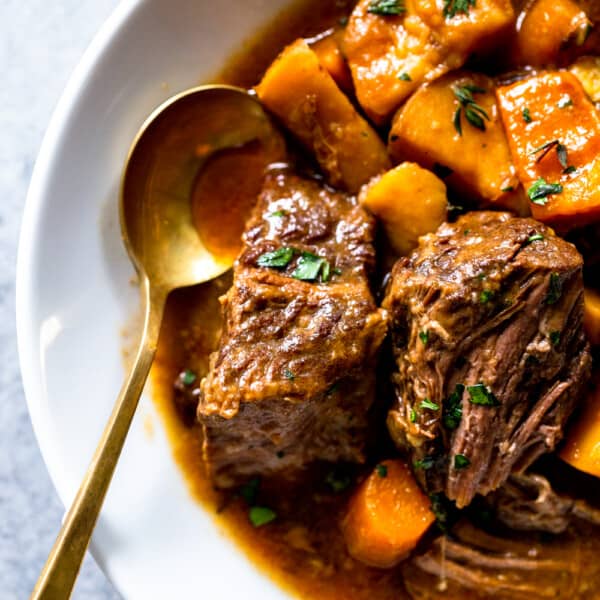
Next time you want to grill some burgers, be sure to make this 40 minute hamburger bun recipe first. I suggest adding my Best Ever Grilled onions to your burger. And speaking of burgers, have you tried my Shallot White Cheddar Burger?

40 minute hamburger buns
Ingredients
- 2 tablespoons active dry yeast
- 1 cup plus 2 tablespoons warm water about 110 degrees
- 1/3 cup vegetable oil
- 1/4 cup sugar
- 1 large egg beaten
- 1 teaspoon salt
- 3 to 3-1/2 cups all-purpose flour
For topping
- 1 egg yolk
- 1 TBSP water
- 2 TBSP sesame seeds
Instructions
- Add yeast and warm water to a large bowl. Add oil and sugar; let stand for 5 minutes. After 5 minutes, mixture should be foamy.
- Whisk in egg. Slowly mix in the salt and flour. Continue to add flour until you have a soft dough.
- Using a dough hook, knead in a mixer for 3-5 minutes, until dough is smooth and elastic. (If you don't want to use a mixer, you can knead by hand on a lightly floured surface.) Do not let rise. Divide into 8 equal pieces; shape each into a ball. Do not let the dough rise.
- Preheat oven to 425 degrees. Place the dough balls on a greased or lined baking sheet. Cover with a kitchen towel and let rest for 10 minutes. After 10 minutes, brush the buns with an egg was, then sprinkle with sesame seeds. Bake until golden brown, 8-12 minutes.
Notes
Nutrition
Nutrition information is automatically calculated, so should only be used as an approximation.
adapted from Taste of Home


Wow. These were amazing and so easy. I made them today and the family enjoyed burgers for dinner. They were substantial, rose perfectly while baking and were done in 10 minutes. A+ recipe, thank you.
SO glad you loved them!
Please people. These are easy and really really great. Yes you have to play with the moisture ratio a bit with the flour but that’s bread baking for you. Superb, super high and airy orbs of perfection. My patties are waiting with bated breath…
So glad you like them!
Ok, so I’ve made this recipe a few times, and read through the comments to fix a couple issues I’ve experienced (as some others have also experienced). Overall, this is an amazing recipe, but I needed to implement a few tweaks to get it to work properly in my kitchen.
– Problem: The dough can be too sticky. Solution: start with 3 cups flour, and add the 1/2 cup if needed. If still too sticky, add a bit more, it won’t hurt the recipe. These ratios depend greatly on the environment you’re working in, the type/brand of flour you’re using, and the recipe is done in cups instead of weights (weights are usually more consistent and precise). You want a dough that is workable without being ultra frustrating. My first attempt was very sticky.
– Problem – they aren’t big enough/they are too dense – I found my first batch to be a bit dense and small. Solution: To fix these two issues, you need to smush the balls down into thick pancakes (about 0.75″ to 1″ thick) on the greased/lined pan and let them rise a bit more than the recipe says (about 30 mins +/-). You ideally want them to look puffy before putting them into the oven. The recipe will work as-is (and still be really delicious), but the result I found is quite a bit denser than I’m used to for a burger bun. The smush and rise method will let them spread out a bit more (bigger base) and the extended rise will make them airy-er. The result from the recipe as it’s written I found to be tasty, and quite sturdy. If that’s your thing (or you’re pressed for time) then follow the recipe!
Thank you Mike, for the suggestions. Mine turned out the same way and I was wondering how to fix it. Now they are more like the consistency of a regular bun.
These were truly amazing! Even my son gave me a big compliment on these buns and he usually doesn’t comment at all. Whole family loved them!
These were really fast and easy to make and turned out great! Next time I might reduce the sugar a bit and definitely going to make 10 buns with this recipe instead of 8 and just reduce the baking time a tiny bit.
Thanks for posting!!
These buns were fantastic! They looked exactly like the pictures and were super tasty.
Admittedly, homemade buns are not quite as soft and light as store-bought buns but they taste great and don’t contain conservatives or emulsifiers.
That is great. I don’t like conservatives all over my buns. 🙂
Delicious and so quick and easy! Made in the time it took my husband to get the kids ready to go out 😂 Burger buns available here in Switzerland are rubbish plus supermarkets closed on Sunday 😱
So delicious and easy to make! Thank you 🙏🏻
So glad you loved it!
These were absolutely amazing! I can’t believe how quick and easy these were to make! I’m wondering if you or anyone else has tried doubling or tripling the recipe? Trying to think ahead for the summer. Thank you for sharing this recipe, definitely going to keep this in my back pocket!
So glad you liked it!
oops forgot to rate, 5 stars
This looks like a wonderful recipe. Can you make the dough a couple days in advance of baking? Also has anyone tried to bake small batches in an airfryer?
Hi, I haven’t tried to make the dough in advance. I would just keep it in the fridge for a slow rise. With so much yeast, it might get over proofed (there is so much yeast in these so that they rise quickly). Let us know if you give it a try!
I just made these for my family and my dad made the patties. The buns were perfect and even my sibling liked them. The only change was that I had to bake them for 18 to be golden but they were amazing!!
So glad you loved them!
A++ flawless, so delicious! We will never buy buns in the store again.
So glad you love them!
Didn’t want to make a trip to the store for buns. I bake but never tried buns before. Had my doubts that you could get good bread with only one short rise time. These are delicious!!!!!
I’ll not be buying expensive buns from the deli ever again.
Love, love them
I’m so glad you loved them!
These are amazing! I’ve made them several times and they have turned out perfectly each time. I’ve been using only 1.5 tbsps of yeast and will try them with just 1 next time. I just let them rise a little longer. I’m always amazed by their soft deliciousness! I’ll rarely buy store bought buns again!
So glad you love them!
Love love love theese
I used everything bagel seasoning on top. Amaaaazzzing
I’m so happy you love them!
Yes, this recipe definitely deserves 5 stars. I don’t give out my stars easily either. The recipe was fast, easy, and the Buns had very good flavor. My only critique would be that the buns were a little bit too thick and tall for hamburgers. So the ratio of bun to Burger somehow he needs to be tweaked. I’m not sure that can be done with a quick rise recipe like this, so I think I will have to make my Burgers thicker to compensate. I have made this recipe twice, and it turned out perfect both times. I’ve also been on a quest for a super soft sub sandwich bun, so I decided to use this recipe to make two large French style loves that I could cut fill with ingredients and cut into sandwich portions. Big mistake. I doubled the recipe, and with one half of the dough I made 8 hamburger buns, and the other half of the dough I made 2 large long French style loaves. The hamburger buns turned out great, the two large long french-style loaves did NOT. They puffed up and Rose very nicely when they baked. When I pull them out of the oven and temped them they only reached a hundred and fifty degrees. So I put them back in the oven for an additional 8 minutes. They over browned and deflated and we’re still slightly doughy inside even though the thermometer registered 208 degrees. Moral of the story? Don’t double the recipe, don’t make this recipe into two long large French style loaves, and don’t try to bake both 8 hamburger buns and 2 large long French style loaves at the same time. Any thoughts that anybody else might have on my observations is welcome!
Thanks for the tips! Here is recipe I use for french bread loaves and my family has them eaten before I can make subs out of them. https://thefoodcharlatan.com/one-hour-french-bread-recipe/
Hope you like them!
As a pro baker I didn’t think these buns would turn out so good!! Hats off to you for coming up with such a wonderfully textured and flavourful item!!
I WILL be making these from now on. Much better than what I make and sell at my bakery 🙂
I’m so happy to hear that!
This was my first time making rolls. And it was very easy. Thank you so much for this simple and very easy recipe!!! I will be making them again.
Hi Meghan,
Thanks for this super handy recipe. Have been a chef for over 10 years and never found a recipe that works so well in crunch time. Still pretty new to the whole bread making thing though. A few kinks I’ll need to iron out:
1. Yeast didn’t froth up as much as yours. I was a little slow in getting the oil (I used melted butter at about 35°C for added richness) and the sugar in the with the water as I was still measuring out and converting ingredients – by which time the core temp had dropped to 37-38°C. I suspect this was just a little too low to really kick off the yeast. That, and I keep my dry yeast in the freezer for freshness, so perhaps I didn’t leave it out long enough to bring it to room temp (20°C) before throwing it in with the water. Might of shocked it a bit.
2. I added 3 1/4 cups (400g) of all-purpose flour – double sifted and added gradually as the dough came together with a spatula. Based on your description of “smooth and elastic” it was a little difficult to tell if I’d added enough flour or not. I suspect I could’ve added more but I was trusting my limited bready intuition at the time.
3. After 5 minutes with the hooked hand-mixer, dough was soft, sticky, elastic but much much “looser” than yours in the photo. They didn’t hold their shape and were difficult to handle. Yours look very firm and seem to hold their shape well which makes me wonder which setting you knead on among other things that could’ve caused this. I have a 450kw handmixer with hooks with a setting of 1-5 +turbo. I kneaded on setting 3. On my second attempt I’ll do the full 5mins on high (setting 5) and see what happens. Tips would be great.
4. The cutting and shaping of the dough for obvious reasons was hard and dough sat flat on the baking mat but they baked surprisingly well. The crown broke on all but honestly I like that look so I’m not bothered. They tasted quite sweet which could’ve been enhanced by my sub for butter. Though I’ll reduce the sugar to 50g next time and see what happens. 65g (1/4 cup) was a bit too sweet for my tastes though I understand the sugar will give the yeast a good boost of activity so I’ll see how the slight adjustment turns out. The structure was surprisingly good – small, tight air bubbles with a nice soft bite and some elasticity in the crumb which really makes for a great texture. This is what convinces me this is great recipe and I just need to practice a bit.
5. There wasn’t any mention of a steam element. Was this on purpose? Making bread is new, but baking it I have a lot of experience and we’ve always used a steaming element in the baking of the bread for that essential crispy crust. I suppose your recipe is really going for the soft light burger bun, so fair enough. But that’d be another element I’ll play around with.
6. Would you consider making a metric version to your ingredients list and temp? Would make it real nice for us anal-retentive bakers who insist on measuring everything out. 😂
It’s great I can knock them up in the time it takes to cook dinner for the fam. Today I just focused on getting it right (or as close to 😉) but I could totally see myself knocking them out during a simple dinner when I have an hour to get it on the table. Thanks and keep in touch!
A
Hi, so glad you liked the recipe – I use a kitchen aid mixer, knead it on medium – medium high for 5 minutes. I would say you could add a tiny bit more flour if the dough is too sticky to work with. This recipe doesn’t need a steam element , but let us know if you try it and what the results are!
First time making these. Was able to use the dough for 6 buns. My hubs likes big burgers. Only issue I has was a few of the tops burst and had some big cracks. I followed your instructions to the “T”. I’m thinking maybe I didn’t get enough air out before shaping them? The dough was soft, sticky and smooth so it wasn’t dry or too wet. Should I warm up the oven with a pan of water so they bake with steam maybe? Anyway, they tasted great and I plan to bake these from now on. Goodbye to store bought buns!
Hi – I haven’t had that happen before. When you shape the dough into balls, it’s best to put the seam on the bottom, so the tops are smooth. I wonder if that could be the reason?
Hi! I would like to make these this week but was wondering how long to mix in a stand mixer? Every time I’ve tried other recipes for buns they always come out so heavy and dense 🙁
These look delicious!
Thanks!!
Hi, you mix it 3-5 minutes. The dough should be smooth and elastic. I find it is usually closer to five minutes. The dough will be sticky, but when you remove it, dust it with flour and give it a few turns. The flour will make it easier to work with. Just be sure not to add too much flour, or they will be dense. Another reason they could turn out dense is if your yeast is not active. Be sure to follow the instructions and proof the yeast for five minutes at the beginning of the recipe. It should foam up, then you know your yeast is good.
I happened upon this recipe as I didn’t have “proofing” time with last minute dinner idea. I always make homemade bread/ buns and I have to say this was probably the best recipe I’ve come across. So easy and they were delicious!! Thank you!!
So glad to hear that!